Back-up your Raw Data before doing any process!
The following steps are the protocol which I used for my data analysis. Any other experiment or experimental process may require rearrangements on this protocol. I am trying to help for operating the fMRI data analysis via BrainVoyager; however, think wisely for your own analysis. Reading the UserGuide is highly recommended.
1. CREATE VMR FILE
Follow the steps of “New Doc Wizard”.
Use data from T1-weighted scan.
naming: Subject.vmr
2. ACPC AND TAL TRANSFORMATION
Volumes –> 3D Volume Tools –> Talairach
Under “ACPC Transformation” part
– press the “Detect MSP, AC, PC”
– press the “Transform to ACPC”
Under “Specification and visualization of Talairach landmarks”
– press the “Save .TAL…”
– press “ACPC –> TAL…q”
3. SEGMENTATION
Volumes –> 3D Volume Tools –> Segmentation
Press the “Autom. Segm.” button.
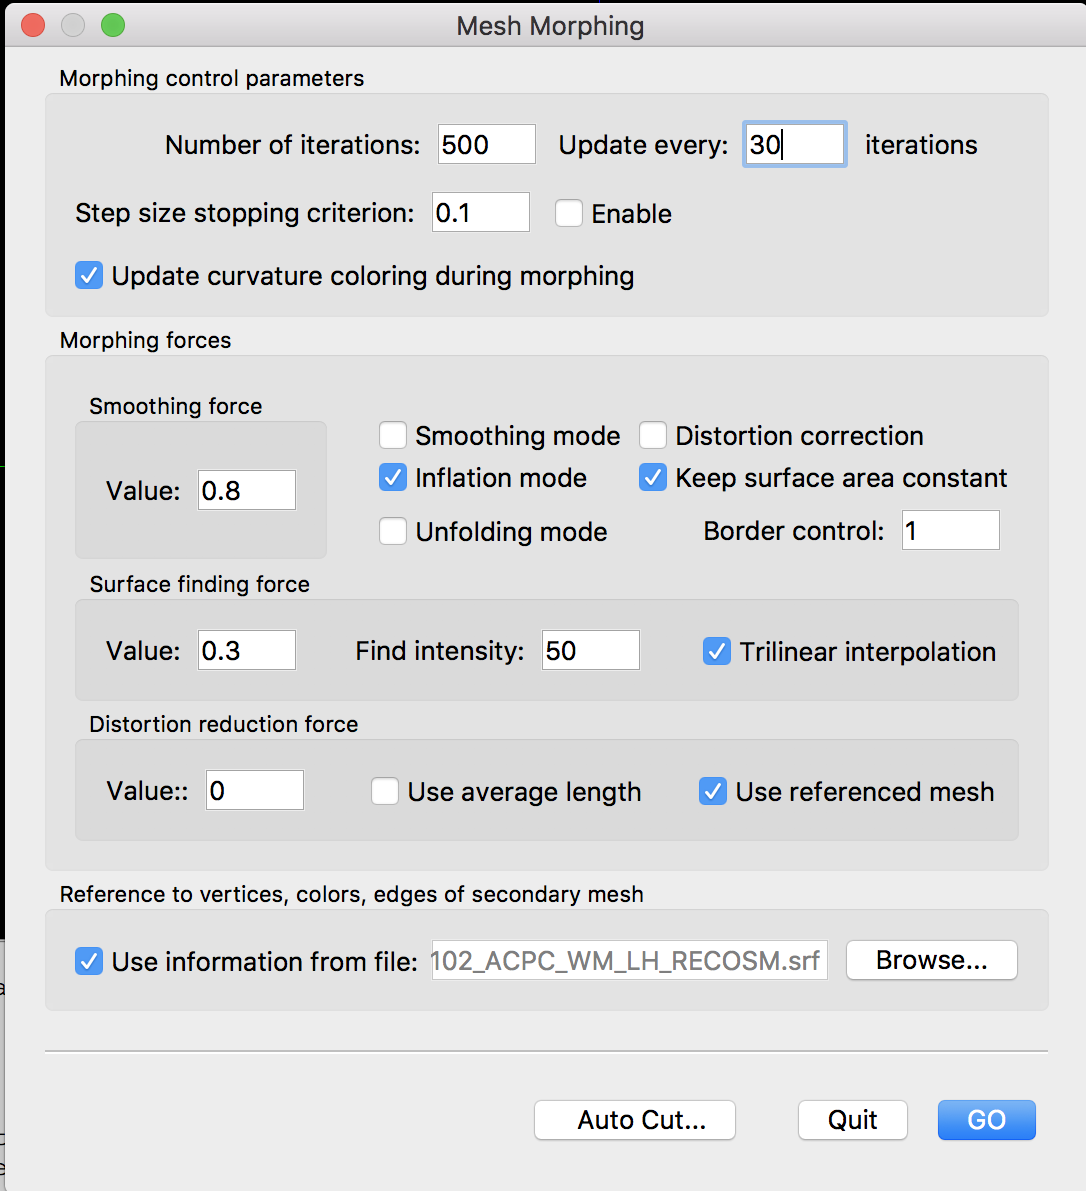
4. MESH MORPHING
Meshes –> Mesh Morphing
Inflation mode is on.
5. SMOOTH MESH
Meshes –> Background and Curvate Colors
3 times “Smooth” the mesh
6. CREATE FMR FILE
Follow the steps of “New Doc Wizard”.
Create FMR files for each functional scan.
naming: Subject_Condition.fmr
7. FMR PREPROCESSING
Analysis –> FMR Preprocessing
Slice-Scan Time Correction, Temporal Filtering and 3D Motion Correction is applied.
- To apply intra-session alignment:
Advanced –> 3D motion correction Options –> “Select the FMR file for the first run as reference file”
8. FMR-VMR COREGISTRATION
While Subject.vmr is open, go to 3D Volume Tools –> Coregistration.
“Select FMR…” and press the “Align”.
First proceed Initial Alignment. If the result seems to be appropriate, run Final Alignment.
9. CREATE VTC FILE
Go to Analysis –> Create Normalized VTC from FMR Data
Select the files required for the relative parts.
Select ACPC at the top bar. Then, add ACPC.trf
10. CREATE PNG FILES FOR EACH FRAME
If you are performing pRF estimation, you need to have screenshots of each frame presented during each volume of TR. The saved PNG files are required to be:
- binary (0 and 1 or black and white)
- 150px * 150px in size
You can save each frame via the tool you are using for stimulus presentation.
No responses yet